

Discovering the perfect monitor for your photo editing needs is crucial to ensure that your images are displayed accurately and with the highest level of detail. This guide will focus on the key factors to consider when selecting a monitor and what to look for in a photo editing monitor, including color accuracy, resolution, and ergonomics, to help you make an informed decision.
Color Accuracy & Calibration
Color accuracy and calibration are the most critical factors to consider when choosing a monitor for photo editing. A monitor's color gamut, which refers to the range of colors it can display, is essential in ensuring that the edited images accurately represent the intended colors.
sRGB Color Gamut
sRGB, or standard RGB, is the most widely used color gamut. It is the default color space for most digital devices, including monitors, cameras, and printers. sRGB covers a relatively narrow range of colors, which can lead to a loss of detail in certain color ranges, especially in the greens and blues. However, it is sufficient for general web use and casual image editing.
Adobe RGB Color Gamut
Adobe RGB offers a much broader color gamut, covering a wider range of colors, especially in the blues and greens. This makes it ideal for professional image editing, as it can accurately display subtle color variations. Adobe RGB is particularly useful for printing, as it can produce more accurate and vibrant colors. Let's look at the difference between Adobe RGB and sRGB Color.

In addition to the color gamut, factory calibration and ICC (International Color Consortium) profiles play a vital role in ensuring color accuracy. Factory calibration involves the manufacturer calibrating the monitor to specific color standards before shipping, ensuring that the monitor is set to display colors accurately right out of the box.
ICC profiles are small files that contain information about a device's color characteristics. They are used to translate colors between different devices, ensuring that the colors displayed on the monitor are the same as those intended by the image creator. ICC profiles can be created during the factory calibration process or through DIY calibration methods.
For those who want to calibrate their monitors themselves, there are several DIY tools and methods available. One popular method is to use a colorimeter, such as the X-Rite i1Display Pro, which measures the colors displayed by the monitor and creates a custom ICC profile. Another method is to use software calibration tools, such as Adobe Gamma, which guides the user through a series of color adjustments to create a custom profile.
Resolution & Pixel Density
Resolution and pixel density are critical aspects to consider when selecting the best monitor for image editing, as they directly affect the level of detail and precision achievable.
The Impact of 4K, 5K, and 8K Displays on Image Editing
Higher resolutions like 4K, 5K, and 8K provide several benefits for image editing. These displays offer a much higher pixel density, resulting in sharper and more detailed images. This increased detail is particularly important for tasks that require precision, such as retouching and color grading.
For example, a 4K display typically has a resolution of 3840 x 2160 pixels, which is significantly higher than a Full HD display with a resolution of 1920 x 1080 pixels. This increased resolution allows for more accurate color representation and a more detailed view of the image, making it easier to identify and correct subtle issues.
Pixel Density: Why It Matters for Detail Work
Pixel density determines how detailed the image appears on the screen. A higher pixel density means that more pixels are packed into a given area, resulting in a sharper and more detailed image. For image editors, a higher pixel density is essential as it allows for more precise work, particularly when dealing with small details such as textures and patterns.
Comparing Full HD, QHD, and UHD Resolutions for Photo Editing
When comparing different resolutions for photo editing, it is essential to consider the specific needs of the task. Full HD (1920 x 1080 pixels) is a common resolution for general use but may not be sufficient for detailed image editing. Quad High Definition (QHD) with a resolution of 3200 x 1800 pixels offers a significant improvement over Full HD, providing a higher pixel density and more detailed images. Ultra High Definition (UHD) with a resolution of 3840 x 2160 pixels or higher offers the highest level of detail and is ideal for professional image editing tasks.
Screen Size & Aspect Ratio
Screen size and aspect ratio significantly impact the workflow and overall user experience when selecting the best monitor for image editing.
Optimal Screen Sizes for Different Workflows
The ideal screen size for image editing depends on the specific workflow and personal preferences. For general photo editing tasks, a 27-inch monitor is often considered the sweet spot, providing ample space to view and edit images without overwhelming the workspace. However, for more complex tasks or those who prefer a larger workspace, 32-inch monitors can be beneficial, allowing for more extensive multitasking and better visibility of detailed images.
Aspect Ratio: 16:9 vs. 16:10 vs. 21:9
The aspect ratio of a monitor is also crucial for photo editing. The most common aspect ratios are 16:9, 16:10, and 21:9. For general photo editing, a 16:9 aspect ratio is suitable, providing a good balance between vertical and horizontal space. This ratio is ideal for tasks that require simultaneous viewing of multiple windows or tools.
On the other hand, a 16:10 aspect ratio offers more vertical space, making it better suited for tasks that involve extensive scrolling or vertical comparisons. The ultra-wide 21:9 aspect ratio is ideal for multitasking and provides an immersive experience, but it may not be necessary for all image editing tasks.
Dual Monitor Setups vs. Single Large Display
Another important consideration is whether to use a dual monitor setup or a single large display. Dual monitor setups offer the advantage of increased workspace and the ability to dedicate each monitor to specific tasks. This can be particularly useful for tasks that require simultaneous reference to multiple images or tools.
However, single large displays can provide a more cohesive and immersive experience, especially with ultra-wide aspect ratios. Ultimately, the choice between a dual monitor setup and a single large display depends on individual preferences and the specific requirements of the workflow.

HDR Support & Brightness
HDR support and brightness are crucial aspects to consider when selecting the best monitor for image editing, as they significantly impact the overall performance of the monitor for color-critical work.
HDR Support
HDR (High Dynamic Range) technology is a vital feature in modern monitors, particularly for photo editing. HDR allows for a broader range of colors, higher contrast, and increased brightness levels, resulting in more accurate and detailed representations of images.
The benefits of HDR for photo editing are numerous. HDR enables the display of a wider color gamut, ensuring that the colors in the edited images are more accurate and true to life. This is particularly important for photographers and graphic designers who require precise color representation. Additionally, HDR technology allows for higher contrast ratios, resulting in more detailed shadows and highlights, enhancing the overall visual quality of the edited images.

Standard vs. DisplayHDR Certifications
HDR support can be found in various forms, including standard HDR and DisplayHDR certifications. Standard HDR is a more general term that refers to the monitor's ability to display HDR content. However, it may not meet specific standards for brightness, color accuracy, or contrast.
DisplayHDR certifications, on the other hand, are more stringent and ensure that the monitor meets specific requirements for HDR performance. There are several levels of DisplayHDR certifications, including DisplayHDR 400, DisplayHDR 600, and DisplayHDR 1000, each with increasing levels of brightness and color accuracy.

Optimal Brightness Levels for Color-Critical Work
For color-critical work such as photo editing, optimal brightness levels are crucial. A monitor with a high peak brightness level is essential to ensure that the colors and details in the images are accurately represented. The recommended brightness levels for color-critical work vary, but generally, a peak brightness of at least 500 nits is considered suitable. However, some monitors can produce peak brightness levels of up to 1,000 nits or more, which can be beneficial for more demanding applications.
Connectivity & Ergonomics
Connectivity and ergonomics are two crucial aspects that significantly impact the overall user experience when choosing the best monitor for image editing.
Essential Ports for Photo Editing
To ensure seamless connectivity, a photo editing monitor should have a range of essential ports. These include USB-C, which supports high-speed data transfer, power delivery, and display connectivity, making it particularly useful for photographers who need to transfer large image files quickly. DisplayPort, a digital video interface designed to connect devices to displays, supports high-resolution displays and is ideal for photo editing tasks that require precise color accuracy. HDMI, a widely used port for connecting devices to displays, supports high-definition video and is commonly used for presentations and video playback.

Adjustability Features
A photo editing monitor should also offer adjustability features to ensure optimal comfort and reduce eye strain during extended periods of use. These features include tilt, which allows users to adjust the viewing angle to their preference, reducing glare and improving visibility; swivel, which enables the monitor to rotate left or right, making it easier to share the screen with colleagues or clients; height adjustment, which allows users to position the monitor at a comfortable viewing height, reducing strain on the neck and back; and pivot, which allows the monitor to rotate from landscape to portrait mode, particularly useful for photographers who need to edit vertical images.
Built-in Color Calibration Sensors
Built-in color calibration sensors are a crucial feature in a photo editing monitor. These sensors ensure that the monitor's color accuracy is maintained over time, which is essential for professional photographers who require precise color representation. The sensors automatically adjust the monitor's color settings to ensure that the displayed colors are true to the original image.
Top Picks for Photo Editing Monitors
1. Best Overall: BenQ PD2706UA

The BenQ PD2706UA stands out as the best overall monitor for image editing due to its exceptional color accuracy, high resolution, and ergonomic design. This monitor is ideal for professionals who require precise color representation and a comfortable viewing experience.
One of the key features that make the BenQ PD2706UA stand out is its 27-inch QHD (2560 x 1440) IPS panel, which provides a high pixel density and excellent color reproduction. This ensures that images are displayed with precise color accuracy, making it perfect for professionals who work with images daily. Additionally, the monitor supports 100% of the sRGB color space, ensuring that colors are consistent and true to life.
Another important feature is the monitor's ergonomic design. It has a height-adjustable stand, allowing users to customize the viewing angle to their preference. This feature is particularly useful for professionals who spend long hours working on image editing tasks, as it helps reduce eye strain and promotes comfortable working.
Furthermore, the BenQ PD2706UA has a range of connectivity options, including HDMI, DisplayPort, and USB ports. This allows users to easily connect multiple devices, making it an ideal choice for those who need to work with multiple screens or devices simultaneously.
2. Best Value for Money: Iiyama Prolite

The Iiyama Prolite is a cost-effective monitor that does not compromise on quality. It offers a range of features that make it an excellent choice for those on a budget.
One of the key features of the Iiyama Prolite is its 24-inch Full HD (1920 x 1080) TN panel. While it may not have the same level of color accuracy as the BenQ PD2706UA, it still provides a good viewing experience and is suitable for general image editing tasks.
Another important aspect of the Iiyama Prolite is its affordability. With a price tag significantly lower than the BenQ PD2706UA, it is an attractive option for those who need a reliable monitor without breaking the bank.
When looking for a budget monitor, there are several features to consider. Firstly, look for a monitor with a good pixel density to ensure that images are displayed clearly. A Full HD resolution is a minimum requirement for most image editing tasks. Additionally, consider the connectivity options available, as having multiple HDMI and USB ports can be useful for connecting multiple devices.
3. Premium Choice: BenQ SW321C

The BenQ SW321C is an advanced monitor designed specifically for professional photographers and image editors. This premium choice justifies its price tag with a multitude of advanced features that cater to the needs of those who require exceptional color accuracy and professional-grade performance.
The BenQ SW321C boasts a 99% Adobe RGB color space coverage, ensuring that the colors displayed on the screen are true to the original image. This level of color accuracy is crucial for professional image editing, where even the slightest deviation from the original colors can significantly impact the final result.
The monitor supports HDR10 and HLG (Hybrid Log-Gamma) formats, allowing for a wider dynamic range and more vivid colors. This feature is particularly useful for image editors who work with high-dynamic-range content. Additionally, the monitor's 10-bit panel can display up to 1.07 billion colors, providing a much broader color gamut than standard 8-bit panels, resulting in smoother transitions between colors and a more detailed representation of the image.

The BenQ SW321C is designed for heavy-duty use, with a fast response time and low input lag. This ensures that the monitor can keep up with the demands of professional image editing software, such as Adobe Photoshop and Lightroom.
4. Best Ultra-Wide for Panoramas: Dell UltraSharp U3821DW

The Dell UltraSharp U3821DW is an ultra-wide monitor designed for panoramic editing. This monitor offers a unique set of benefits that make it an excellent choice for image editors who work with panoramic images.
The ultra-wide display provides a significantly larger workspace than standard monitors, allowing image editors to view and manage multiple windows simultaneously. This feature is particularly useful for panoramic editing, where having multiple windows open at once can greatly enhance productivity.
The Dell UltraSharp U3821DW's ultra-wide display enables image editors to multitask more efficiently. With the ability to have multiple windows open side by side, image editors can easily compare different versions of an image, access reference materials, and work on multiple projects simultaneously.
The monitor's ultra-wide aspect ratio is ideal for panoramic editing, as it allows image editors to view and edit panoramic images in their entirety. This feature is particularly useful for image editors who work with large, high-resolution panoramic images.
5. Budget-Friendly Option: Asus ProArt PA248QV

The Asus ProArt PA248QV is a budget-friendly monitor designed for image editors who require a balance of performance and affordability. This monitor offers a range of features that make it an excellent entry-level choice for image editors.
The Asus ProArt PA248QV boasts a 100% sRGB color space coverage, ensuring that the colors displayed on the screen are accurate and true to the original image. This level of color accuracy is sufficient for most image editing tasks, making it an excellent choice for entry-level image editors.
The monitor's IPS panel provides a wide viewing angle, ensuring that the image remains clear and vibrant even when viewed from the side. This feature is particularly useful for image editors who often work with clients or colleagues.
The monitor's adjustable stand allows image editors to customize the viewing angle and position of the monitor to suit their needs. This feature is particularly useful for image editors who work in different environments or have specific ergonomic requirements.
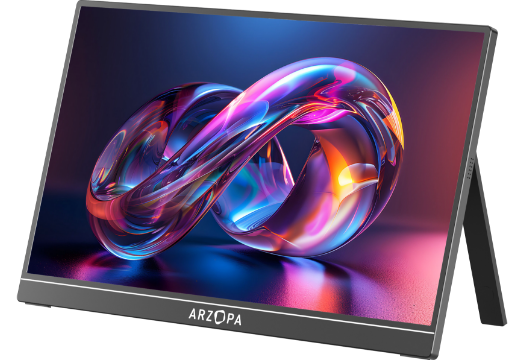
Also see: Arzopa Z1RC 2.5K 100% sRGB Portable Monitor
With 2.5K QHD resolution at 2560x1600 pixels of resolution, images are sharper and individual, pixels are unnoticeable. Excellent for content creation or watching streaming media. Besides, Arzopa Z1RC 2.5K Portable Monitor is one of the best travel portable monitors.
Arzopa Z1RC 2.5K Portable Monitor | Brilliant QHD 500nits 8bit Display

- 16.0 Inch Full HD (2560x1600p) IPS with a premium aluminum design.
- 1.7 lb weight and 0.3-inch thickness make it ideal for on-the-go use.
- Supports PS5, Xbox, Switch, Steam Deck, PCs, phone, and more.
- Includes a built-in stand for both portrait and landscape viewing.
Common Misconceptions Debunked
When it comes to selecting the best monitor for image editing, several myths and misconceptions can lead to confusion and poor choices. Here, we will debunk three common misconceptions to ensure that you make an informed decision when selecting a monitor for your image editing needs.
1. More expensive equals better
One of the most prevalent misconceptions is that a more expensive monitor automatically means better performance. However, this is not always the case. While it is true that high-end monitors often come with advanced features and superior build quality, the real-world performance may not necessarily justify the higher price tag.
For instance, a monitor with a high price tag may boast advanced features like HDR support or a high refresh rate, but if these features are not essential for image editing, the additional cost may not be justified. Instead, it is crucial to focus on the specific features that matter most for image editing, such as color accuracy, resolution, and panel type.
In terms of real-world performance, a mid-range monitor with an IPS panel and a high resolution (e.g., 4K or QHD) may provide better color accuracy and a more detailed image than a more expensive monitor with a VA panel and lower resolution. Therefore, it is essential to evaluate the specific features and performance of a monitor rather than relying solely on the price.
2. IPS panels are always the best
Another common misconception is that IPS (In-Plane Switching) panels are always the best choice for image editing. While IPS panels are known for their excellent color accuracy and wide viewing angles, they may not always be the best option depending on specific needs and preferences.
VA (Vertical Alignment) panels, for example, often offer better contrast ratios and deeper blacks, which can be beneficial for image editing tasks that require a high level of detail and contrast. TN (Twisted Nematic) panels, on the other hand, are known for their fast response times and lower cost, making them suitable for tasks that require quick refresh rates.
When comparing IPS, VA, and TN panels for photo editing, it is essential to consider the specific requirements of your work. If color accuracy and wide viewing angles are paramount, an IPS panel may be the best choice. However, if you prioritize contrast ratio and response time, a VA or TN panel might be more suitable.

Conclusion
By carefully considering factors such as color accuracy, resolution, panel type, HDR support, connectivity, and ergonomics, you can find the perfect monitor to enhance your productivity and creativity. With this ultimate guide as your reference, you now have the knowledge and insights to make an informed decision that will serve your image editing needs. Remember to prioritize your specific requirements and budget to find the best display for photo editing. We hope this guide has been valuable to you, and we encourage you to share your findings and experiences with fellow designers to help them make the best choice for their own workflows.