

In this comprehensive tutorial, we'll take you through each step of calibrating your TV to ensure you get the best possible viewing experience. Whether you're a movie enthusiast or a gaming aficionado, proper calibration can significantly enhance your enjoyment. So, let's dive in and transform your viewing experience!
The Importance of TV Calibration
Television calibration is a crucial process that can significantly enhance your viewing experience. Many people don't realize that their TVs often come with default settings that are far from ideal for optimal picture quality. By taking the time to calibrate your TV, you can unlock its full potential and enjoy more accurate colors, improved contrast, and overall better image quality.
Calibration involves adjusting various picture settings to ensure that your TV displays images as close as possible to what the content creators intended. This process can make a noticeable difference in how you perceive colors, details, and overall picture quality across different types of content, from movies and TV shows to video games and sports.
The benefits of proper TV calibration include:
- More accurate color reproduction
- Improved contrast and black levels
- Enhanced detail in both bright and dark scenes
- Reduced eye strain during extended viewing sessions
- A more immersive and cinematic experience
- Potentially lower energy consumption by optimizing brightness levels

While professional calibration services are available, many aspects of TV calibration can be done at home with some patience and the right tools. In this guide, we'll explore various methods of TV calibration, from basic DIY techniques to more advanced approaches using specialized equipment.
How to Calibrate Your TV for Optimal Picture Quality
Step 1: Choose the Right Picture Mode
The first step in calibrating your TV is selecting the appropriate picture mode. Most modern TVs come with several preset picture modes, each designed for different viewing scenarios. For the most accurate picture quality, experts recommend using the following modes:
- Movie
- Cinema
- Filmmaker
These modes typically provide the most neutral and accurate picture settings out of the box. Avoid modes like "Dynamic" or "Vivid," as they tend to oversaturate colors and create an unnatural picture.
Step 2: Adjust Brightness and Contrast
Brightness and contrast are two fundamental settings that greatly impact picture quality. Here's how to adjust them:
Brightness:
- Find a dark scene in a movie or use a calibration pattern.
- Adjust the brightness until you can see details in the darkest areas without making the overall image look washed out.
- Look for a balance where shadow details are visible but blacks still appear deep.
Contrast:
- Use a bright scene or calibration pattern with white elements.
- Increase the contrast until you can see detail in the brightest areas without losing information.
- Ensure that whites look bright and crisp without appearing blown out.
Step 3: Set Color and Tint
Color temperature and tint adjustments help ensure that colors appear natural and accurate:
- Set the color temperature to "Warm" or "Low." This prevents whites from appearing too blue.
- Use a skin tone test pattern or a scene with people to adjust the tint.
- Aim for natural-looking flesh tones without excessive redness or greenness.
Step 4: Fine-tune Sharpness
Contrary to what you might expect, it's often best to lower the sharpness setting:
- Start by turning the sharpness down to zero.
- Slowly increase it until the image looks crisp without introducing artificial edges or halos around objects.
- Be conservative with this setting, as too much sharpness can create an unnatural, overly processed look.
Step 5: Disable Unnecessary Processing Features
Many TVs come with various image processing features that can actually degrade picture quality:
- Turn off noise reduction and motion smoothing features for most content.
- Disable any "eco" or power-saving modes that might limit brightness.

- If your TV has a "game mode," consider using it for gaming to reduce input lag.
Step 6: Adjust for Your Viewing Environment
Your room's lighting conditions can significantly impact how you perceive the image on your TV:
- For dark room viewing, lower the backlight or OLED light setting to reduce eye strain.
- In brighter rooms, you may need to increase the backlight to maintain picture quality.
- Consider using bias lighting behind your TV to improve perceived contrast and reduce eye fatigue.
Smart Calibration on Samsung Smart TVs
Samsung has introduced an innovative feature called Smart Calibration for their latest Neo QLED 2022 models. This feature simplifies the calibration process by using your smartphone's camera to analyze and adjust the TV's picture settings.
To use Smart Calibration:
- Ensure your Samsung TV is a compatible 2022 Neo QLED model.
- Download the SmartThings app on your smartphone (compatible with Galaxy S, Note, Z Flip, Z Fold, or iPhone with Face ID).

- Connect your phone and TV to the same Wi-Fi network.
- Open the SmartThings app and select your TV.
- Choose the Smart Calibration feature.

- Select between Basic Mode (15 seconds) or Professional Mode (5-8 minutes).
- Follow the on-screen instructions to position your phone and complete the calibration process.
This feature offers a user-friendly approach to TV calibration, making it accessible to those who may not have the expertise or equipment for manual calibration.
DIY TV Calibration: A Comprehensive Guide
For those who want to go beyond basic adjustments, here's a more detailed DIY calibration process:
Use Calibration Discs or Patterns:
- Download free calibration patterns like AVS HD 709 or purchase a calibration disc.
- These provide specialized test patterns for precise adjustments.
Set Gamma:
- Aim for a gamma setting of 2.2 for most
- Use the appropriate test pattern to adjust gamma accurately.
Fine-tune Color Balance:
- Use color test patterns to adjust individual red, green, and blue levels.
- Aim for a neutral gray in grayscale patterns.

Check and Adjust Overscan:
- Ensure your TV isn't cropping the edges of the image.
- Use overscan patterns to adjust if necessary.
Calibrate for Different Inputs:
- Repeat the process for each input (HDMI ports, built-in apps) as settings may vary.
Consider Time of Day:
- Create separate calibrated presets for daytime and nighttime viewing.
Use a Colorimeter (Advanced):
- For precise color adjustments, consider using a colorimeter like the Calibrite ColorChecker Display Pro.
- This device measures color output accurately and can guide you to professional-level calibration.
Remember, calibration is both a science and an art. While following these steps will get you close to an ideal picture, personal preference still plays a role in final adjustments.
TV Calibration Kits: What You Need to Know
For those interested in more advanced calibration, there are several TV calibration kits available in the market. These kits typically include a colorimeter or spectroradiometer and software to guide you through the calibration process.
Popular TV calibration kits include:
X-Rite i1Display Pro:
-
Price range: $250 - $400
-
Professional-grade colorimeter
-
High accuracy and speed

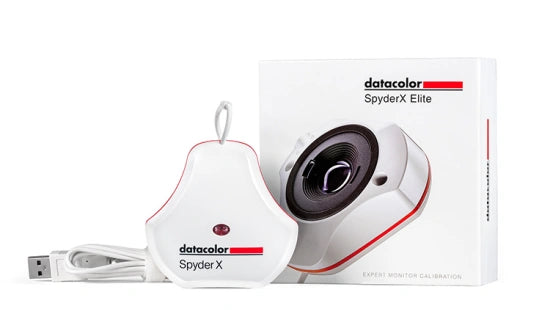
Datacolor SpyderX Elite:
- Price range: $200 - $300
- User-friendly software
- Supports multiple display types
Calman ColorChecker:
- Price range: $150 - $250
- Designed specifically for TV calibration
- Includes calibration software

When choosing a calibration kit, consider the following factors:
- Compatibility with your TV brand and model
- Ease of use, especially if you're new to calibration
- Accuracy and repeatability of measurements
- Software features and support
While these kits can provide excellent results, they do require a learning curve and some time investment to use effectively.
Calibration Software for TV and Monitor
For those who want to delve deeper into calibration, there are several software options available. One popular free option is HCFR (HomeC
inema-FR).
HCFR Features:
- Supports various measuring devices, including colorimeters and spectroradiometers.
- Offers comprehensive color analysis tools.
- Provides detailed reports and graphs for in-depth calibration.
- Allows for continuous measurements of displayed patches.
- Compatible with Windows operating systems.
To use HCFR:
- Download and install the software from the HCFR website.
- Connect your colorimeter or other supported measuring device.
- Use the software to generate test patterns and measure your display's output.
- Analyze the results and make adjustments to your TV settings accordingly.
While HFCR is powerful, it's primarily aimed at enthusiasts and professionals due to its complexity. For most users, the built-in calibration tools on their TVs or simpler calibration discs will be sufficient.
Expert Tips for Calibrating Your TV
To get the most out of your TV calibration, consider these expert tips:
-
Break-in Period: Allow your new TV to run for about 100 hours before performing a full calibration. This allows the panel to settle and produce more consistent results.
-
Calibrate for Different Content: Create separate calibration profiles for movies, sports, and gaming if your TV supports multiple custom picture modes.
-
Re-calibrate Periodically: TV performance can change over time. Plan to recalibrate every 6-12 months for optimal performance.
-
Consider Professional Calibration: For high-end TVs or if you want the absolute best performance, consider hiring a professional calibrator. Expect to pay between $250 to $400 for this service.
-
Use Reference Content: After calibration, watch high-quality, well-mastered content to appreciate the improvements in picture quality.
-
Be Patient: Proper calibration takes time. Don't rush the process, and give your eyes time to adjust to the new settings.
-
Trust Your Eyes: While measurements are important, your personal perception matters. Make final tweaks based on what looks best to you.
Conclusion
Calibrating your TV is a rewarding process that can significantly enhance your viewing experience. Whether you choose to use built-in tools, invest in calibration equipment, or hire a professional, taking the time to optimize your TV's picture settings will result in more accurate colors, improved contrast, and an overall better image quality. Remember that calibration is not a one-time task; periodically rechecking and adjusting your settings will ensure that you continue to enjoy the best possible picture quality from your TV for years to come.
FAQs
Q: How long does TV calibration typically take?
A: The time required for TV calibration can vary depending on the method used. A basic DIY calibration using built-in TV tools or a calibration disc might take 30 minutes to an hour. More advanced calibration using specialized equipment and software can take 2-3 hours or more. Professional calibration services usually require 1-2 hours per display. It's important to note that rushing through the process can lead to suboptimal results, so it's best to set aside ample time to ensure accurate calibration.
Q: Can I use my smartphone to calibrate my TV?
A: While smartphones can be useful for basic calibration, they're not a substitute for professional equipment. Some TV manufacturers, like Samsung, have developed specific apps that use your smartphone's camera for calibration. These can be effective for general improvements, but they may not match the accuracy of dedicated calibration tools. For most users, smartphone-based calibration can be a good starting point, but for the best results, consider using proper calibration equipment or hiring a professional.
Q: How often should I calibrate my TV?
A: The frequency of TV calibration depends on several factors, including the type of TV, usage patterns, and your personal preferences. As a general guideline, it's recommended to calibrate your TV:
- When you first set it up
- After the initial break-in period (about 100-200 hours of use)
- Every 6-12 months for regular maintenance
- If you notice significant changes in picture quality
- After major firmware updates that might affect picture settings
Remember that modern TVs tend to be more stable over time compared to older models, so annual calibration is often sufficient for most users.
Q: Is professional calibration worth the cost?
A: The value of professional calibration depends on several factors, including the quality of your TV, your viewing habits, and your sensitivity to picture quality. For high-end TVs or home theater setups, professional calibration can be worth the investment, typically costing between $250 to $400. Professional calibrators have access to specialized equipment and expertise that can achieve results beyond what's possible with DIY methods. However, for budget or mid-range TVs, the improvement might not be as noticeable, and DIY calibration using built-in tools or calibration discs might suffice. Consider your budget and how much you value picture quality when deciding whether professional calibration is right for you.