

Best Multi Monitor Setup for Windows and Mac
If you want to expand your horizons and enhance your productivity with a multi-monitor setup, then this post is for you. This comprehensive guide demystifies the process of setting up dual monitors, and advances to configurations with three or more displays. It caters to both Windows and Mac users, offering detailed step-by-step instructions, troubleshooting advice, and productivity hacks to transform your workspace. Let's explore the details now.
Checklist for Hardware Connection to Connect Monitors
Before diving into the software settings, it's essential to ensure that your hardware is properly connected. Here's a step-by-step checklist to help you connect your monitors:
-
Monitor Selection: Choose two monitors that are compatible with your computer. Ensure they have the same resolution and refresh rate to avoid any display issues. Popular monitor brands like Dell, LG, and ASUS offer a wide range of options, with prices starting from around $100 for basic models and going up to $1000 or more for high-end, professional-grade displays.
-
Cable Connection: Identify the video output ports on your computer. Common ports include HDMI, DisplayPort, VGA, and USB-C. Select the appropriate cables to connect your monitors to the computer. For example, if your computer has two HDMI ports, you can use two HDMI cables to connect both monitors. HDMI and DisplayPort cables are the most common, with prices ranging from $10 to $50 depending on the length and quality.

-
Port Availability: If your computer has limited video output ports, consider using a video splitter or a docking station to expand the number of available ports. For instance, if your laptop only has one HDMI port, you can use an HDMI splitter to connect both monitors. Video splitters typically cost between $20 and $50, while docking stations can range from $50 to $300 or more, depending on the features and brand.

-
Monitor Settings: Adjust the monitor settings to ensure they are set to receive input from the correct port. This may involve pressing a button on the monitor to switch between HDMI 1 and HDMI 2. Consult your monitor's user manual for specific instructions on accessing and adjusting these settings.
By following this hardware connection checklist, you'll be well on your way to setting up your dual monitor configuration. Next, we'll explore the software settings for both Windows and Mac users.
Detailed Guide for Windows 10 & 11 Display Settings Adjustment
Once your monitors are connected, it's time to configure your Windows settings. Here's a step-by-step guide for Windows 10 and 11:
-
Press the Windows Key + P: This will open the Projector window, which allows you to manage your displays.
-
Select the Duplicate or Extend Option: Choose the "Duplicate" option to mirror the same display on both monitors or select "Extend" to use both monitors as a single, extended desktop. For most users, the "Extend" option is preferred, as it allows you to spread your work across both screens.

-
Identify Your Monitors: Windows will detect both monitors and label them as "1" and "2." You can click on "Identify" to display a number on each monitor, helping you determine which monitor is which. This is particularly useful when you have multiple monitors of the same size and model.

-
Adjust Display Settings: Right-click on an empty area of the desktop and select "Display settings." This will open the Display Settings window, where you can adjust the resolution, orientation, and display mode for each monitor. For optimal performance, ensure that both monitors are set to their native resolution, which is typically the highest available option.

-
Customize Your Desktop: You can now move Windows, apps, and files between both monitors. You can also set a different wallpaper for each monitor by right-clicking on the desktop and selecting "Personalize." This allows you to create a personalized and visually appealing workspace that suits your preferences.
By following these steps, you'll be able to configure your dual monitor setup on a Windows 10 or 11 system. Next, we'll explore the setup process for Mac users.
Also see: How to use Arzopa portable monitor as a second screen
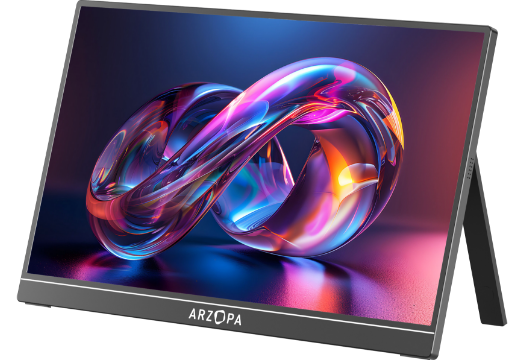
If you are looking a external monitor for your Mac and Windows, why not choose Arzopa Z1FC gaming portable monitor?
Easy Steps to Configure Dual Monitors on Your Mac
Setting up dual monitors on a Mac is relatively straightforward. Here's how to do it:
-
Connect Your Monitors: Connect both monitors to your Mac using the appropriate cables. If your Mac only has one video output port, consider using a video splitter or a docking station. Popular options for Mac users include the CalDigit TS3 Plus Thunderbolt 3 Dock ($299) and the Belkin Thunderbolt 3 Dock Pro ($299).
-
Go to System Preferences: Click on the Apple menu and select "System Preferences."

-
Select Displays: Click on "Displays" to open the Display Preferences window.

-
Arrange Your Displays: You can now arrange your displays to match your physical setup. Click and drag the white menu bar to the monitor you want to use as your primary display. This is typically the monitor directly in front of you or the one you use most frequently.

-
Adjust Display Settings: You can adjust the resolution, brightness, and display mode for each monitor by selecting the desired monitor and making the necessary changes. As with Windows, ensure that both monitors are set to their native resolution for the best performance and image quality.

With these steps, you'll be able to set up a dual monitor configuration on your Mac. Now, let's explore some advanced multi-monitor setups for power users.
How to Configuring 3 or More Displays for Windows and Mac?
When setting up multiple monitors, configuring three or more displays requires careful planning to ensure optimal layout and performance. The key to achieving this is to consider the purpose of each monitor and how they will be used. For instance, if you are a graphic designer, you may want to dedicate one monitor to your design software, another to your references and resources, and the third to your email and communication tools.
To optimize your layout, start by identifying the primary tasks you will be performing on each monitor. This will help you determine the ideal placement and orientation of each screen. For example, if you are working on a project that requires frequent switching between applications, consider placing your most frequently used apps on the center monitor for easy access.
Another crucial aspect to consider is the resolution and refresh rate of each monitor. Ensure that all monitors are set to the same resolution and refresh rate to maintain a seamless viewing experience. You can adjust these settings in your graphics card control panel or through the display settings on your operating system.
Additionally, consider the physical placement of your monitors. Position them at a comfortable distance and angle to reduce eye strain and improve productivity. You can also experiment with different monitor heights and tilts to find the most ergonomic setup for your needs. For example, you may want to place your primary monitor directly in front of you at eye level, with secondary monitors slightly angled towards you on either side.
Understanding Daisy Chaining Monitors and Its Benefits
Daisy chaining monitors is a technology that allows you to connect multiple monitors to a single video output, enabling you to expand your desktop across multiple screens. This technology is particularly useful for those who require a large desktop real estate, such as video editors, programmers, and gamers.
To daisy chain monitors, you will need a graphics card that supports Multi-Stream Transport (MST), which allows multiple monitors to be connected to a single DisplayPort output. You will also need monitors that support DisplayPort 1.2 or higher, as this is the minimum requirement for MST. Popular graphics cards that support MST include the NVIDIA GeForce RTX 3080 (starting at $699) and the AMD Radeon RX 6800 XT (starting at $649).
The benefits of daisy chaining monitors are numerous. Firstly, it simplifies cable management, as you only need to connect a single cable to your computer. Secondly, it allows for a more flexible and customizable desktop setup, as you can easily add or remove monitors as needed. Finally, daisy-chaining monitors can improve performance, as the graphics card only needs to render a single image that is then split across multiple screens.
To set up a daisy chain configuration, connect the first monitor to your computer using a DisplayPort cable. Then, connect the second monitor to the first monitor using another DisplayPort cable, and so on. Ensure that each monitor is set to the correct input source (e.g., DisplayPort 1, DisplayPort 2) and that the graphics card is configured to recognize the daisy chain setup.
Graphics Card Requirements for Windows and Mac
When setting up multiple monitors, particularly high-resolution setups, the graphics card requirements become a critical factor. A high-performance graphics card is essential to ensure smooth performance and prevent screen tearing or lag.
For a triple-monitor setup, a minimum of 4GB of video memory is recommended, with 8GB or more ideal for high-resolution setups (2560x1440 or higher). Additionally, look for graphics cards with multiple DisplayPort outputs, as this will allow you to connect multiple monitors directly to the card.
Some popular graphics cards for multi-monitor setups include:
- NVIDIA GeForce RTX 3070 (starts at $499)
- AMD Radeon RX 6800 XT (starts at $649)
- NVIDIA GeForce RTX 3080 (starts at $699)

When choosing a graphics card, consider the specific requirements of your monitors, including resolution, refresh rate, and connectivity options. It is also essential to ensure that your power supply unit (PSU) can handle the increased power draw of a high-performance graphics card. A 750W or higher PSU is recommended for most multi-monitor setups with high-end graphics cards.
Customizing Display Layout for Windows and Mac
Drag and drop for perfect Screen alignment. When setting up multiple monitors, one of the first tasks is to arrange the displays in a way that feels comfortable and efficient. This can be achieved by customizing the display layout. Most operating systems allow users to drag and drop the display icons to arrange them in the desired configuration. This feature is particularly useful when dealing with monitors of different sizes or resolutions.
For example, if you have a larger monitor on the left and a smaller monitor on the right, you can drag the smaller monitor's icon to the right of the larger monitor's icon to create a seamless transition between the two screens. This customization allows users to optimize their workspace according to their specific needs and preferences. Additionally, some operating systems offer features like snapping windows to the edges of the screen or using keyboard shortcuts to move windows between monitors, further enhancing the multi-monitor experience.
Just experiment with different layouts to find the one that works best for your needs. For example, if you frequently reference documents while working on a primary task, consider placing the secondary monitor directly above your primary monitor for easy viewing. Alternatively, if you use your secondary monitor for communication tools like email or chat, placing it to the side of your primary monitor may be more efficient.
Resolution and Color Management
Another crucial aspect of setting up multiple monitors is managing resolution and color consistency. When using multiple monitors, it is essential to ensure that the resolution and color settings are consistent across all displays. This can be achieved by adjusting the display settings in the operating system's control panel or settings app.
For instance, if you have two monitors with different resolutions, you can set the resolution of the lower-resolution monitor to match the higher-resolution monitor. This ensures that the visuals are consistent across both screens, reducing eye strain and improving the overall viewing experience. To do this on Windows, go to "Display settings" and select the monitor you want to adjust. Then, choose the desired resolution from the "Resolution" dropdown menu. On macOS, go to "System Preferences" > "Displays" and select the "Scaled" option to choose a resolution that matches your other monitor.
Furthermore, color management software can be used to calibrate the color settings of each monitor, ensuring that colors are accurately represented and consistent across all displays. Popular color management tools include X-Rite i1Display Pro (starting at $269) and Datacolor SpyderX Elite (starting at $269). These tools come with hardware colorimeters that measure the color output of your monitors and create custom color profiles to ensure accurate and consistent color representation.
To calibrate your monitors using color management software, first, ensure that your monitors have been turned on for at least 30 minutes to warm up. Then, follow the software's on-screen instructions to place the colorimeter on your monitor and begin the calibration process. The software will guide you through the necessary steps, which typically involve adjusting your monitor's brightness, contrast, and color temperature settings to achieve optimal color accuracy.
By taking the time to properly manage resolution and color settings across your multiple monitors, you'll create a more visually cohesive and comfortable workspace that enhances your productivity and reduces eye strain.
Extended vs. Mirrored Displays: When to Use Each Mode and Why
When setting up multiple monitors, users have the option to either extend their desktop across multiple monitors or mirror the same image on both screens. The choice between these two modes depends on the specific use case and personal preference.

Extended displays are ideal for tasks that require a large workspace, such as graphic design, video editing, or coding. In this mode, each monitor functions as a separate desktop, allowing users to have multiple windows and applications open simultaneously. This setup is particularly useful for multitasking and can significantly improve productivity. For example, a video editor could have their editing software on one monitor, their preview window on another, and their file explorer on a third monitor, allowing them to efficiently manage their workflow without constantly switching between applications.
To set up extended displays on Windows, press the Windows key + P and select "Extend." On macOS, go to "System Preferences" > "Displays" and uncheck the "Mirror Displays" option.
On the other hand, mirrored displays are suitable for presentations or demonstrations where the same image needs to be displayed on multiple screens. In this mode, the same image is duplicated on both monitors, ensuring that the audience sees the same content. Mirrored displays are also useful for gaming, where a single image is displayed across multiple monitors to create a wider field of view. This setup can provide a more immersive gaming experience, particularly for racing or flight simulation games.
To set up mirrored displays on Windows, press the Windows key + P and select "Duplicate." On macOS, go to "System Preferences" > "Displays" and check the "Mirror Displays" option.
Consider your specific needs and workflow when deciding between extended and mirrored displays. If you require a large workspace and frequently multitask, extended displays are likely the best choice. However, if you often give presentations or want to create a more immersive gaming experience, mirrored displays may be the way to go.
How to Customise Windows Taskbar Management for Multi-monitor Efficiency?
When using multiple monitors on a Windows system, managing the taskbar becomes crucial for efficient workflow. Here are some steps to customize the taskbar for multi-monitor efficiency:
-
Taskbar Location: You can move the taskbar to any monitor by right-clicking on the taskbar and selecting "Taskbar settings." Under "Multiple displays," select the monitor where you want the taskbar to appear. This allows you to have your taskbar on your primary monitor, making it easier to access your most-used applications and windows.
-
Taskbar Spanning: To span the taskbar across multiple monitors, right-click on the taskbar and select "Taskbar settings." Under "Multiple displays," toggle on "Show taskbar on all displays." This allows you to access the taskbar from any monitor, which can be particularly useful if you frequently work with applications across multiple screens.
-
Taskbar Toolbars: Add toolbars to the taskbar by right-clicking on the taskbar and selecting "Toolbars." Choose the toolbars you want to add, such as the Quick Launch toolbar or the Address toolbar. This enhances accessibility and organization, allowing you to quickly access frequently used tools and folders without cluttering your desktop.
Harnessing the Power of MacOS Spaces and Mission Control Virtual Desktops
On macOS, Spaces and Mission Control are essential features for managing multiple monitors and virtual desktops. Here's how to harness their power:
-
Creating Spaces: To create a new Space, swipe up on the trackpad with three fingers or press the Mission Control key on your keyboard. Click the "+" icon at the top right to create a new Space. Spaces allow you to create multiple virtual desktops, each with its own set of applications and windows, helping you organize your work and reduce clutter.
-
Assigning Applications: Drag an application window to the top right corner of the screen and release it to assign it to a specific Space. This helps organize your workflow by separating tasks across different Spaces. For example, you could have one Space dedicated to your web browser, another for your email client, and a third for your design software.
-
Switching Spaces: Use the Mission Control key or swipe left or right on the trackpad with three fingers to switch between Spaces. This allows you to quickly access different tasks and applications without having to minimize or close windows.

By leveraging Spaces and Mission Control, you can create a more organized and efficient multi-monitor workflow on your Mac. Experiment with different Space configurations to find the setup that best suits your needs and work style.
Conclusion
In conclusion, setting up multiple monitors can significantly enhance your productivity and expand your horizons. Whether you're a Windows or Mac user, this comprehensive guide has provided you with detailed step-by-step instructions, troubleshooting advice, and productivity hacks to transform your workspace. By following these guidelines, you can easily set up dual monitors or even configurations with three or more displays. So why wait? Start enjoying the benefits of a multi-monitor setup today! Remember to share your insights in the comment section below and spread the word to friends who may also benefit from multi monitor setups. Happy multitasking!