

How to Split Screen on Windows?
Split screen functionality is an essential feature for multitasking and enhancing productivity on Windows. By allowing users to work on multiple tasks simultaneously, split screen streamlines work processes, improves organization, and saves time. In this comprehensive guide, we'll explore the ins and outs of mastering split screen on both Windows 10 and 11.
Quick Start: Snap Assist in Windows 10 & 11
To get started with split screen, you can use the Snap Assist feature in Windows 10 and 11. Here's how:
- Instant Split: Press the Windows key + Left/Right arrow to instantly snap windows to the sides of the screen.
- Snap Layouts: Access Snap Layouts via the maximize button or by pressing Win + Z for multiple window arrangements.
- Three-Way Split: Use Win + Left/Right arrow, then repeat with another window for a third section.
What is Snap?
Before diving into advanced techniques, it's important to understand the basics of split screen functionality in Windows. Snap is a feature that allows users to divide their screen into multiple sections, enabling them to work on multiple tasks simultaneously. To use Snap, simply drag a window to the edge of the screen, and it will automatically resize to occupy half of the screen. This makes it easy to compare windows side-by-side and efficiently manage multiple tasks.

Benefits of Using Snap for Multitasking
-
Improved Productivity: Snap significantly improves productivity by enabling users to work on multiple tasks simultaneously. For example, you can have a document open on one side and a reference website on the other, making it easier to research and write at the same time.
-
Enhanced Organization: Snap helps keep your workspace organized by separating different tasks into distinct sections, reducing clutter and making it easier to focus on specific tasks.
-
Efficient Time Management: By allowing you to work on multiple tasks at once, Snap helps save time. You can respond to emails while working on a document, reducing the need to constantly switch between windows.
-
Enhanced Collaboration: Snap can be particularly useful in collaborative environments. For instance, a team can work on a project together, with each member working on a different aspect of the project in their own snapped window.
Windows 10 vs. Windows 11 Split Screen
While both Windows 10 and 11 offer robust split screen functionality, there are some key differences to note:
Windows 10 Snap Features:
- Snap Assist suggests other windows to fill remaining space when snapping a window.
- Snap Grid offers a grid-based system for precise window placement.
- Multiple Snap Points allow snapping windows to the left, right, top, or bottom of the screen.
Windows 11 Enhancements:
- Improved Snap Assist provides a more extensive list of suggested windows.
- Snap Layouts allow users to create and save custom window arrangements.
- Enhanced Snap Grid is more responsive and accurate.
- Drag and Drop simplifies the snapping process by eliminating the need for precise edge alignment.
How to Split Screen on Windows 10 & 11?
Now that you understand the basics, let's explore some advanced techniques for mastering split screen on Windows. Whether you want to compare documents, browse while taking notes, or keep an eye on a video while working, mastering Snap Assist and other window management tools can make your workflow smoother.
1. How to Split a Screen on Windows?
Method 1: Using Snap Assist (Drag and Drop)
- Open the windows you want to arrange.
- Drag a window to the left or right edge of the screen until you see a transparent outline.
- Release the mouse, and Windows will automatically resize the window to fill half of the screen.
- Choose a second window from the thumbnails that appear and click on it. It will fill the other half of the screen.
For Windows 11 users: You’ll see a Snap Layouts option when you hover over the maximize button (top-right corner of any window). Click the desired layout to arrange your windows automatically.
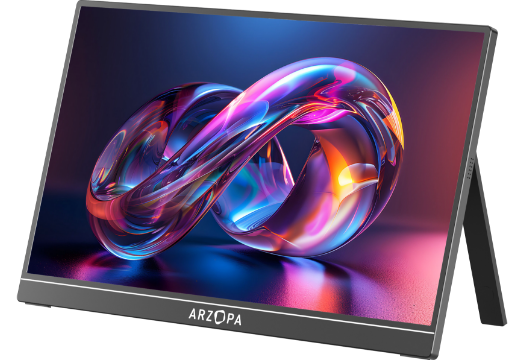
Also see: Arzopa Z1FC 144Hz Portable Gaming Monitor Full Review
Extend your screen at the office, at home or on the go with this convenient, compact display. Conveniently set up your monitor to the left, right or behind your laptop. The dual USB-C ports on each side allow for versatility and better portability.
Method 2: Using Keyboard Shortcuts (Fastest Way)
Use these handy keyboard shortcuts to snap windows instantly:
| Action | Shortcut |
|---|---|
| Snap window to left | Win + Left Arrow |
| Snap window to right | Win + Right Arrow |
| Snap window to top | Win + Up Arrow |
| Snap window to bottom | Win + Down Arrow |
| Expand back to full screen |
Win + Up Arrow (when maximized) |
📌 Pro Tip: After snapping a window to one side, use Win + Up/Down to adjust its position further.
2. Splitting Your Screen into Three or Four Windows
If you need to work with multiple apps at once, Windows allows you to split the screen into three or four sections.
Three-Way Split Screen
- Snap the first window to the left (
Win + Left Arrow). - Snap the second window to the top-right (
Win + Up Arrow). - The remaining space can be filled with the third window.
Four-Way Split Screen
-
Snap the first window to the top-left (
Win + Left Arrow+Win + Up Arrow). -
Snap the second window to the bottom-left (
Win + Left Arrow+Win + Down Arrow). -
Snap the third window to the top-right (
Win + Right Arrow+Win + Up Arrow). -
Snap the fourth window to the bottom-right (
Win + Right Arrow+Win + Down Arrow).
Ideal for users working on spreadsheets, comparing data, or keeping multiple apps visible at once!
3. How to Customize Snap Settings
You can tweak Snap Assist settings to enhance your experience:
Go to Settings → System → Multitasking.
Enable/disable Snap windows features like:
- Auto-adjusting window sizes.
- Suggesting additional windows to snap.
- Showing snap layouts on hover (Windows 11 only).
If Snap Assist isn’t working, check these settings to ensure it’s enabled.
Troubleshooting & Tips of Split Screen on Windows 10 & 11
If you encounter issues with split screen functionality or want to boost your productivity even further, here are some troubleshooting tips and lesser-known shortcuts:
Resolving Snap Issues
-
Ensure Snap is Enabled: Go to Settings > System > Multitasking and make sure the "Snap windows" option is turned on.

- Check Display Settings: Ensure that your monitors are set to the same resolution and display settings to avoid any display issues.
-
Restart Explorer: If Snap stops working, try restarting the Windows Explorer process by pressing Ctrl + Shift + Esc, selecting "Windows Explorer," and clicking "Restart."

Boosting Productivity
- Use Keyboard Shortcuts: In addition to the shortcuts mentioned earlier, you can use Win + Up arrow to maximize a window, Win + Down arrow to restore it, and Win + Left/Right arrow to move windows between monitors.
- Experiment with Layouts: Try out different window arrangements to find the most efficient setup for your workflow. Use Snap Layouts in Windows 11 to create and save custom arrangements.
- Utilize Virtual Desktops: In addition to split screen, you can use virtual desktops to organize your workspace further. Press Win + Tab to access the Task View and create new desktops for different projects or tasks.
Comparison with Third-Party Tools
While the built-in split screen functionality in Windows is robust, some users may prefer the additional features and customization options offered by third-party tools. Here's a brief comparison:
Built-in Snap Features:
- Included with Windows 10 and 11 at no additional cost.
- Offers basic snapping functionality and some customization options.
- Integrates seamlessly with the Windows interface.
Third-Party Tools (e.g. DisplayFusion, AquaSnap):
- Often require a separate purchase or subscription.
- Provide advanced features like custom snap layouts, hotkeys, and multi-monitor support.
- May offer additional customization options and settings.
Ultimately, the choice between built-in and third-party tools comes down to your specific needs and preferences.
Split Screen for Touchscreen Users
If you're using a touchscreen device like a Windows tablet or 2-in-1, you can still take advantage of split screen functionality with a few simple gestures:
- Swipe from the Left: Swipe inward from the left edge of the screen to open the Task View, where you can select windows to snap to the left or right side of the screen.
- Drag and Drop: Use your finger to drag a window to the left or right edge of the screen until you see a gray line indicating the snap point. Release your finger to snap the window into place.
- Adjust Snapped Windows: To adjust the size of snapped windows, simply drag the divider between them to the desired position.
With these touch-friendly gestures, you can enjoy the benefits of split screen even on the go!
Conclusion
Mastering split screen functionality in Windows 10 and 11 can be a game-changer for productivity. By using features like Snap Assist, Snap Layouts, and custom snap distances, you can create an organized and efficient workspace tailored to your specific needs. Do you have any favorite split screen tips or tricks? Share them in the comments below and help others boost their productivity!
FAQs
How do I split the screen in Windows 10 without the taskbar?
To split the screen without the taskbar, you can use the Win + Left/Right arrow shortcuts to snap windows to the sides of the screen. Alternatively, you can drag windows to the top edge of the screen to maximize them, then restore them to their original size by pressing Win + Down arrow.
Can I split the screen into more than two parts?
Yes, you can split the screen into up to four parts using the Snap Layouts feature in Windows 11. In Windows 10, you can achieve a similar effect by snapping windows to the corners of the screen.
Is there a way to customize snap positions?
Yes, you can customize snap positions by modifying the Windows Registry or using third-party tools like GridMove or AquaSnap. These methods allow you to set custom snap distances and create more complex grid layouts.