

Measuring your monitor size may seem like a simple task, but it's crucial to get it right. Whether you're buying a new monitor or setting up your current one, knowing the accurate size is essential. In this ultimate guide, we'll walk you through the process of measuring your monitor size, including some quick tips and the importance of precise measurements.
Understanding Monitor Size Measurement
Before we dive into the step-by-step guide, let's first understand why diagonal measurement is the industry standard for monitor size. Historically, monitors were square or nearly square in shape, making diagonal measurement a convenient way to describe their size. This method was adopted by the industry as it provided a simple and consistent way to compare different monitors.
Moreover, using diagonal measurement allows for easy comparison across different monitor shapes. Modern monitors come in various aspect ratios, such as 16:9, 4:3, and 21:9. If we were to measure monitors based on their width or height, it would be difficult to compare them directly, as different aspect ratios would result in different widths and heights for the same diagonal size. The diagonal measurement, on the other hand, provides a consistent and comparable value across different monitor shapes.
It's important to note that the bezel, which is the outer frame surrounding the screen, is excluded from the monitor size measurement. This ensures that the measurement reflects the actual viewable area of the screen.
The Step-by-Step Guide
Now that we understand the importance of diagonal measurement, let's dive into the step-by-step guide on how to measure your monitor size accurately.
Step 1: Prepare the Measuring Tool
Begin by selecting a measuring tape or ruler that can accurately measure the diagonal distance of your monitor. Ensure the measuring tool is long enough to span the entire diagonal of the screen.
Step 2: Identify the Bezel
Locate the bezel on your monitor. The bezel is the outer frame surrounding the screen. It is essential to exclude the bezel from your measurement to get an accurate size.
Step 3: Position the Measuring Tool
Place the measuring tape or ruler at the bottom left corner of the screen, ensuring it is aligned with the edge of the screen and not the bezel. Hold the tool firmly in place to maintain accuracy.
Step 4: Extend the Measuring Tool
Carefully extend the measuring tape or ruler diagonally across the screen, keeping it aligned with the edges of the screen and avoiding the bezel. Ensure the tool is straight and not at an angle, as this may affect the accuracy of the measurement.
Step 5: Measure the Diagonal Distance
Once the measuring tool is in place, read the measurement at the point where it intersects with the top right corner of the screen. This measurement will provide the accurate diagonal size of your monitor, excluding the bezel.

Step 6: Record and Verify
Record the measurement and verify it by repositioning the measuring tool and taking the measurement again. This ensures the accuracy of the measurement and helps to avoid any errors.
Curved Monitor Measurement
Measuring curved monitors requires special considerations to ensure accurate diagonal measurements that reflect the viewable area. The main adjustment needed is to account for the curvature of the screen.
To measure the diagonal of a curved monitor, you need to account for the curvature. This is done by measuring the diagonal from the center of the screen, following the curve of the monitor. You can use a flexible measuring tape or a string to help you measure along the curve. This will give you the actual diagonal measurement that reflects the viewable area.
It's also important to consider the aspect ratio when measuring curved monitors. Curved monitors often have a wider aspect ratio than traditional flat monitors, which means the screen is more rectangular than square. When measuring the diagonal, ensure you are considering the aspect ratio to get an accurate measurement.
Advanced: Calculating Screen Area
Calculating the screen area of a monitor is a fundamental concept that is crucial in various aspects of layout design, screen real estate management, and even web development. The formula for calculating the screen area is quite straightforward: it is the product of the width and height of the screen, expressed in square units such as square inches or square centimeters.
The formula for calculating the screen area is:
Screen Area = Width x Height
For example, if you have a monitor with a width of 24 inches and a height of 16 inches, the screen area would be:
Screen Area = 24 inches x 16 inches = 384 square inches
Knowing the screen area is beneficial in several scenarios, such as layout design, screen real estate management, web development, gaming and graphics, and accessibility. By understanding the screen area, developers and designers can create more effective, user-friendly, and visually appealing digital platforms.
Alternative Methods
In addition to physical measurement, there are alternative methods and tools available to determine screen size without the need for manual measurement. These include software solutions and online tools that can provide accurate measurements.
One reliable and convenient method is using online tools like the Omni Calculator or Screen Size Calculator. These tools allow users to input the diagonal length of the screen and the aspect ratio to obtain the exact screen size in inches. They are particularly helpful when purchasing a new screen or monitor, as they can help ensure the correct size is selected.

Another alternative method is to consult the manufacturer's specifications for the screen or monitor. Most manufacturers provide detailed specifications, including the screen size, in their product documentation or on their websites. These specifications can be used to cross-reference the measurements obtained from online tools, ensuring the accuracy of the calculations.
Common Misconceptions Debunked
There are several common misconceptions about monitor measurement that can impact the understanding of screen size. It's essential to investigate and refute these misconceptions to ensure accurate measurements.
One common misconception is that the total size of a monitor can be calculated by measuring its width and height. However, this approach is inaccurate because it does not account for the aspect ratio and the diagonal measurement, which are critical components of monitor size.
Another misconception is that the aspect ratio of a monitor does not affect its size. This is incorrect because the aspect ratio significantly impacts the overall screen area and the user's experience. For instance, a 24-inch monitor with a 16:9 aspect ratio will have a different screen area than a 24-inch monitor with a 4:3 aspect ratio.
Some people also confuse the resolution of a monitor with its size. Resolution refers to the number of pixels displayed on the screen, while size refers to the physical dimensions of the monitor. A higher resolution does not necessarily mean a larger monitor, and a larger monitor does not necessarily have a higher resolution.
To accurately measure monitor size, it is crucial to focus on the diagonal measurement and aspect ratio. By understanding the importance of these factors and using accurate methods for measuring monitor size, you can avoid common misconceptions and ensure a clear understanding of monitor size and its impact on the user's experience.
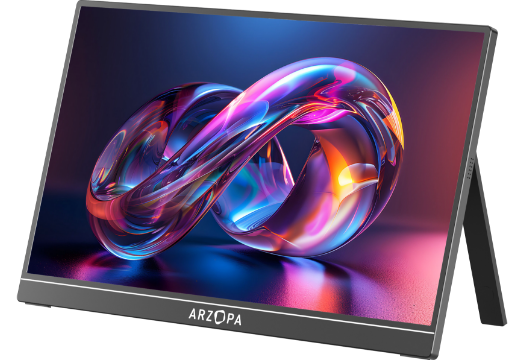
Also see: Arzopa Z1FC Portable Gaming Monitor
Gaming anywhere with Arzopa Z1FC 144Hz Portable Gaming Monitor for PS5, Xbox, Nintendo Switch, and more. Features a full HD and 100% sRGB IPS screen for stunning visuals. Ultra-fast speed of 144Hz allows immediate action on screen. Why not experience smoother, clearer gaming movement now!
Arzopa Z1FC 144Hz Portable Gaming Monitor 16.1" Screen

- 16.1 Inch Full HD (1920x1080p) IPS with a premium aluminum design.
- 1.7 lb weight and 0.3-inch thickness make it ideal for on-the-go use.
- Supports PS5, Xbox, Switch, Steam Deck, PCs, phone, and more.
- Includes a built-in stand for both portrait and landscape viewing.
Buying Guide Integration
Precise monitor measurement plays a pivotal role in the buying process, significantly influencing the purchasing decisions of consumers. Accurate measurements guide buyers in selecting the ideal monitor that meets their specific needs, ensuring a perfect match between user requirements and monitor specifications.
When considering desk space, precise monitor measurement is crucial. Buyers need to ensure that the monitor fits comfortably on their desk, taking into account the available space. This includes measuring the width, height, and depth of the monitor to ensure it does not encroach on other essential items on the workspace.
Resolution preferences are another critical aspect where precise monitor measurement comes into play. Different monitors offer varying resolutions, such as Full HD (1080p), Quad HD (1440p), or 4K (2160p). Buyers need to consider their specific resolution requirements, which are often influenced by their intended use of the monitor.
Visual comfort is also a vital consideration in the buying process, and precise monitor measurement is essential in this regard. Buyers need to consider the monitor's size, aspect ratio, and pixel density to ensure optimal visual comfort. By accurately measuring these factors, buyers can choose a monitor that provides optimal visual comfort, reducing eye fatigue and enhancing overall user experience.
Conclusion
In conclusion, measuring your monitor size accurately is crucial for ensuring the best user experience and making informed purchasing decisions. By following the step-by-step guide and understanding the importance of diagonal measurement, aspect ratio, and screen area, you can accurately determine your monitor size and avoid common misconceptions.
Remember, precise monitor measurement is a critical component of the buying process, guiding purchasing decisions by considering key factors such as desk space, resolution preferences, and visual comfort. By accurately measuring these aspects, you can select a monitor that perfectly matches your needs, enhancing overall productivity, comfort, and user satisfaction.
We hope this ultimate guide has provided you with the knowledge and tools necessary to measure your monitor size accurately. If you found this article helpful, please share it with others who may benefit from this information. And if you have any questions or experiences to share, we'd love to hear from you in the comments below!
FAQs
Q: What if my monitor size doesn't match the advertised size when measured?
A: If your measured monitor size doesn't match the advertised size, it's possible that you may have included the bezel in your measurement. Remember to measure only the viewable screen area, excluding the bezel. If the discrepancy persists, contact the manufacturer for clarification or refer to their provided specifications.
Q: How does aspect ratio affect measurement?
A: Aspect ratio is the proportion of the screen's width to its height. Different aspect ratios, such as 16:9 or 4:3, will result in different screen dimensions for the same diagonal measurement. When measuring your monitor, consider the aspect ratio to ensure you're getting an accurate representation of the screen size.
Q: Can I measure a monitor with a smartphone app?
A: While there are smartphone apps available that claim to measure screen size, their accuracy may vary. For the most precise measurement, it's recommended to use a physical measuring tool, such as a measuring tape or ruler, and follow the step-by-step guide provided in this article.


![What Should I Gift My Mother on Mother's Day? [Arzopa's Fear Picks]](http://www.arzopa.com/cdn/shop/articles/D10-fear-picks_0cb06232-cb50-43ce-9440-e353c12ee5c4.webp?v=1744184148&width=1)