Are you tired of your computer always defaulting to the wrong monitor when you have multiple displays set up? Changing the primary monitor on your Windows or macOS system is a simple process that can greatly improve your workflow and overall user experience. In this comprehensive guide, we'll walk you through the steps to change your primary monitor on both operating systems, as well as provide some helpful tips and troubleshooting techniques.
Windows Users
Quick Steps to Change Primary Monitor
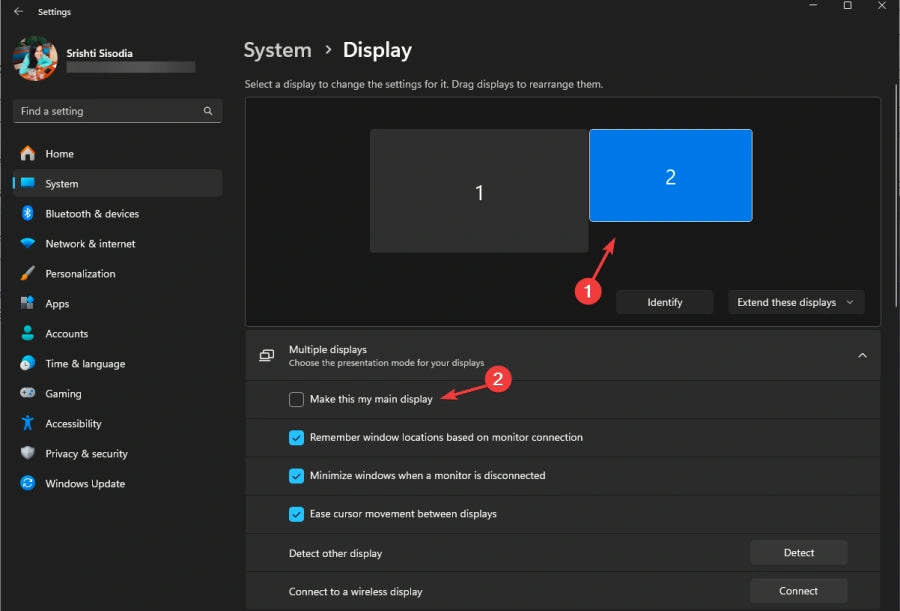
- Right-click on your desktop and select "Display Settings"
- In the Display Settings window, select the monitor you want to set as your primary display
- Check the box labeled "Make this my main display"
- Click "Apply" to save your changes
In-Depth Guide
Understanding Display Settings
Before we dive into the process of changing your primary monitor, it's important to understand the various display settings available in Windows. The Display Settings window is divided into several sections, each with its own set of options:
-
Display: This section allows you to identify your connected displays, adjust their resolution and scaling, and choose how you want to use multiple displays (e.g., duplicate, extend, or show only on one display).

-
Multiple Monitors: Here, you can rearrange your displays by dragging and dropping their icons. You can also set a specific monitor as your primary display by clicking on it and selecting "Make this my main display."

Advanced Display Configuration
For more advanced users, Windows offers additional options for customizing your display outputs. To access these settings, follow these steps:
- Press the Windows key + P on your keyboard, or right-click on an empty area of your desktop and select "Display settings"

- In the Display Settings window, click on the monitor you want to configure
- Scroll down to the "Multiple displays" section and click on the dropdown menu
- From here, you can choose to extend your desktop across multiple monitors, duplicate your displays, or show your desktop only on a specific monitor
If you're experiencing issues with your taskbar not appearing on the correct monitor, you can resolve this by right-clicking on the taskbar, selecting "Taskbar settings," and adjusting the options under "Multiple displays."
Changing Primary Monitor via Registry Editor
For advanced users who are comfortable editing their system registry, it's possible to change your primary monitor using the Registry Editor. However, it's important to note that modifying the registry can be risky and should only be attempted by experienced users. If you're unsure about this process, it's best to stick with the standard Display Settings method.
Windows 10 & 11 Differences
While the process for changing your primary monitor is largely the same in both Windows 10 and Windows 11, there are a few key differences to be aware of:
- Windows 11 has a more streamlined and visually organized Display Settings window compared to Windows 10
- Windows 11 offers improved multi-monitor support, with more flexible arrangement options and better handling of different monitor sizes and orientations
Troubleshooting Common Issues
If you're having trouble getting your primary monitor to change, here are a few common issues and their solutions:
- Display not detected: Ensure that all cables are securely connected to both your computer and monitor. If the issue persists, try updating your graphics drivers to the latest version.
- Incorrect display settings: Double-check that you've selected the correct monitor in the Display Settings window and that your desired settings are applied.
- Graphics driver issues: If you're still having trouble, try uninstalling and reinstalling your graphics drivers to rule out any software conflicts.
macOS Users
How to Set the Main Display on macOS
- Click on the Apple menu in the top-left corner of your screen and select "System Preferences"
- Click on "Displays" in the System Preferences window
- In the Displays window, click on the "Arrangement" tab
- Click and drag the white menu bar to the display you want to set as your primary monitor
- Close the Displays window to save your changes
macOS Customization Tips
In addition to setting your primary monitor, macOS offers several other customization options for your displays:
- Mirroring: To mirror your displays, simply check the box labeled "Mirror Displays" in the Arrangement tab of the Displays window.
-
Resolution and Color Calibration: Click on the "Display" tab in the Displays window to adjust your resolution and refresh rate. You can also calibrate your display's color settings by clicking on the "Color" tab and following the on-screen instructions.

- Night Shift: To reduce eye strain and improve your sleep quality, enable the Night Shift feature in the Displays window. This will automatically adjust your display's color temperature to a warmer, less blue-light-intensive setting at night.
Universal Solutions
If you frequently switch between different operating systems or work with multiple computers, using a third-party software solution can simplify the process of managing your displays. Here are a few popular options:
- DisplayFusion: This powerful tool allows you to easily manage multiple monitors across both Windows and macOS. It offers features like custom wallpapers, window snapping, and hotkey support. DisplayFusion is available for $29, with a free trial version.
- Synergy: Synergy is a cross-platform tool that lets you share your mouse and keyboard across multiple computers. This is particularly useful if you work with multiple machines and want to seamlessly move between them. Synergy offers a free trial, with the full version priced at $29.
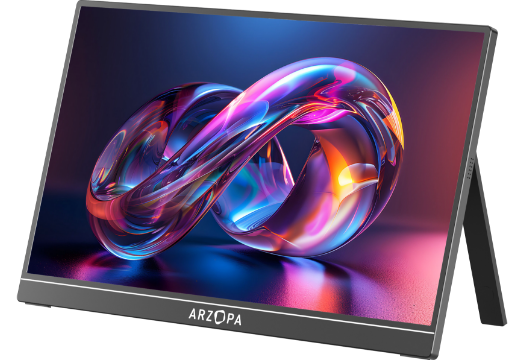
Also see: Arzopa Z1FC 144Hz Portable Gaming Monitor | 16.1" Screen
Extend your screen at the office, at home or on the go with this convenient, compact display. Conveniently set up your monitor to the left, right or behind your laptop. The dual USB-C ports on each side allow for versatility and better portability.
Arzopa Z1FC 144Hz Portable Gaming Monitor 16.1" Screen

- 16.1 Inch Full HD (1920x1080p) IPS with a premium aluminum design.
- 1.7 lb weight and 0.3-inch thickness make it ideal for on-the-go use.
- Supports PS5, Xbox, Switch, Steam Deck, PCs, phone, and more.
- Includes a built-in stand for both portrait and landscape viewing.
Frequently Asked Questions
Q: How do I know which monitor is currently set as my primary display?
A: On Windows, your primary monitor will have the taskbar and Start menu. On macOS, the primary monitor will have the menu bar at the top of the screen.
Q: Can I set different wallpapers for each of my monitors?
A: Yes, both Windows and macOS allow you to set different wallpapers for each monitor. In Windows, right-click on your desktop and select "Personalize," then choose "Slideshow" or "Picture" under "Background." In macOS, open the System Preferences and click on "Desktop & Screen Saver," then select the "+" button to add a new wallpaper for each display.
Q: What should I do if my computer isn't detecting one of my monitors?
A: First, check that all cables are securely connected to both your computer and monitor. If the issue persists, try updating your graphics drivers to the latest version. If you're still having trouble, consult your monitor's manual or contact the manufacturer for further assistance.
Conclusion
By following the steps outlined in this guide, you should now be able to easily change your primary monitor on both Windows and macOS. Whether you're a casual user or a professional working with multiple displays, taking the time to properly configure your setup can greatly enhance your productivity and overall computing experience. If you found this guide helpful, be sure to share it with your friends and colleagues, and feel free to leave a comment below with any additional tips or questions you may have!


